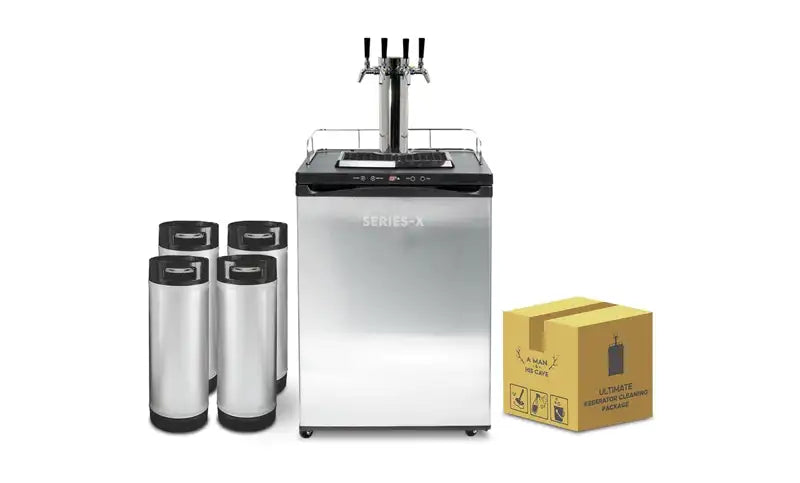
It’s Friday night, and you’re getting your cave ready before the guys come over for Sunday night footy. You’ve set up the home theatre system and retaken the top ranking on your arcade machine, but the kegerator is still in its box. Getting it connected is non-negotiable — you need a ready supply of frothy cold ones on tap to cool down the cheers and cries.
But wondering how to hook up a kegerator yourself? Sounds easy enough, right? It is with our guide — we’ll run through the steps needed to put it in place, connect its various parts and tooling and ensure it froths your schooners with just the right amount of head.
The parts you’ll need for your kegerator setup
- Kegerator unit
- Beer tower
- Beer and gas Lines
- Keg coupler
- CO2 gas cylinder, holster and tubes
- MK4 gas regulator
- All required lines and fittings
- Faucets and handle
- Ball-lock fittings
- Guard rail
- Drip-tray
- Castor wheels
Step-by-step instructions for fabricating your kegerator
Before starting any installation, we recommend thoroughly reviewing your model’s assembly instructions, matching the number of parts in the manual to those received, and confirming your unit’s dimensions fit where you want it placed. This seems simple enough, but when you’re learning how to hook up a kegerator with multiple parts, it can save you some time. And yes, this is just another opportunity for your dad to say, “measure twice, do the work once”, but who’s counting?
- Affix the caster wheels
When unpacking your kegerator, inspect it for any damage and remove any loose parts inside the chamber. Tip the unit on its side and attach the caster wheels — if you have been provided with only two washers, reserve them for the front two wheels. Once this step is completed, gently pull it upright immediately to prevent the compressor oil from travelling into the pipes or other areas, affecting its ability to cool your favourite IPA or pilsner.
- Attach the beer tower
Next, remove the cabinet’s plug on the top of the unit (if there is one) and draw the beer line and beer tower through the opening. As you place the tower down, align the connections of the opening with the tower and twist it right to lock it in place. Of course, this is where you sing “righty tighty, lefty loosey” to double-check that it’s secured in place. If you have done this step right, the tower’s tap should face towards you.
- Secure the counter’s accessories
Instal the guard rail by dropping its feet into the pilot holes on the top of the cabinet and screw in the tap’s handle and place the drip tray directly underneath.
- Secure the gas line and parts
After checking the CO2 regulator is in the off position, attach it to the CO2 gas line tube and fasten it with the self-locking snap-on clamps. Once it is tightly connected, feed it through the rubber plug on the back of the unit. Attach the regulator to the gas cylinder by screwing the regulator nut.
Next, place the CO2 holster and secure it with the required screw fastenings. Slide in your CO2 gas cylinder and twist it, so the number gauge is easy to read and you have easy access to the shut-off valve.
- Connect your beer coupler and gas line
Double-check if your coupler matches your keg — most Australian kegs accept A, D and S-types. After making sure the coupler’s handle is set to the closed position (up and at an angle), connect it to the locking neck of the keg and turn it 25° to the right to safely secure it in place.
Next, attach the open end of the gas line tube to the coupler’s hose barb and lock it with the self-locking snap-on clamps.
- Instal the beer line and tap your keg
After popping off the keg’s protective cap, slide the washer into the beer line’s hex nut and tightly screw it to the coupler. Tap the keg by pulling the coupler’s handle out and down until you hear a click where it locks into place.
Complete this step by calibrating the regular until it reaches the desired pressure — typically, it should be around 12 PSI, depending on the type of beer and climate. For this last step, we recommend taking a break and watching some YouTube videos to ensure it safely releases the right amount of pressure — nobody likes a flat beer.
- Enjoy the fruits of your labour
Congratulations, you’ve learned how to hook up a kegerator and tap a keg like a pro. Pour yourself the first schooner, and like every guy, stand back and marvel that you built your own pub in your man cave — bottoms up!
Live the dream and get your kegerator at A Man and His Cave
While fitting its parts together can feel like a big 3D puzzle, you’ll be sweetly rewarded with an eternal supply of your favourite beer with your own kegerator.
Need more reasons to make your mates jealous and get them to come over? You can score your very own kegerator at A Man and His Cave to ensure you always have a cold one close at hand. Explore the range today to build a premium man cave to rival any pub or entertainment venue.


